03-Use Jupyter Lab
1. Jupyter Lab installation
1.1. Jupyter Lab
Use the following command to install Jupyter Lab: If the download speed of Jupyter Lab is slow, you can use the specified source to install it
sudo apt update
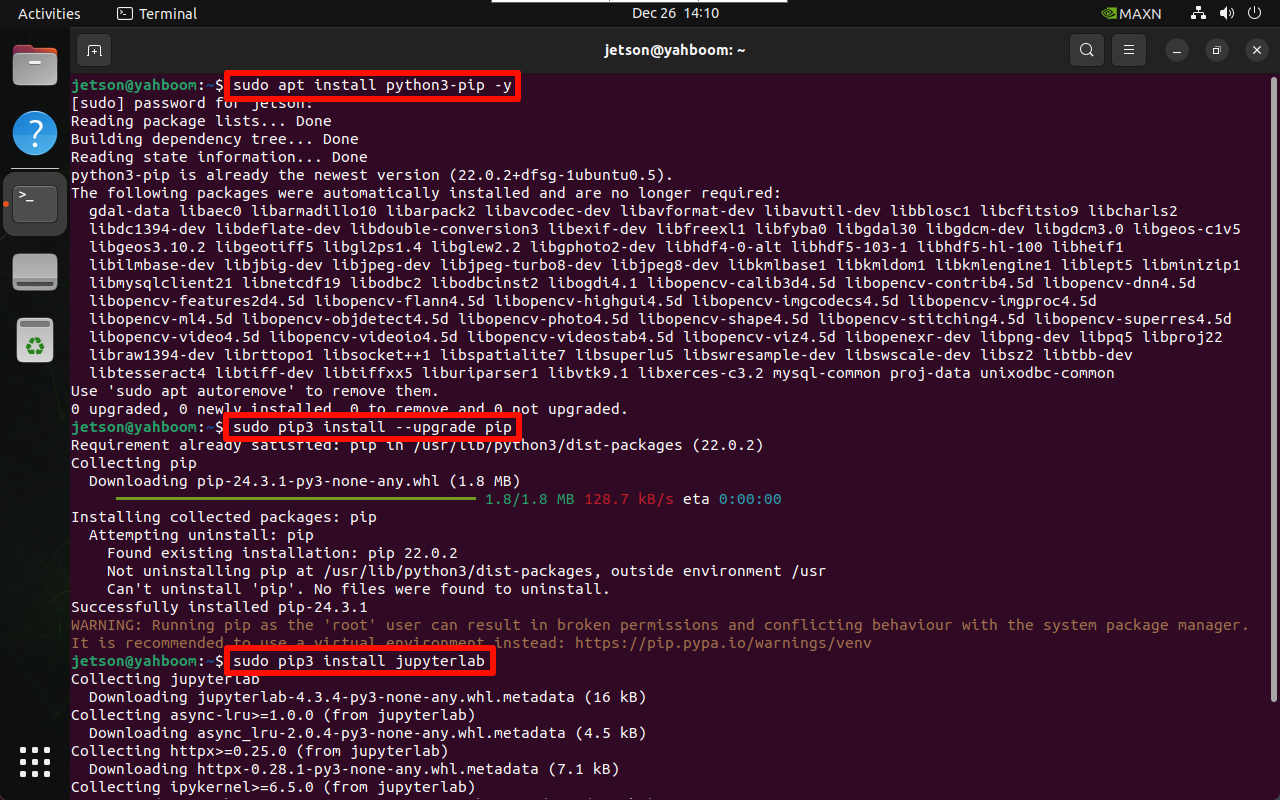
sudo apt install python3-pip -y
sudo pip3 install --upgrade pip
sudo pip3 install jupyterlab
# Tsinghua source: pip3 install jupyterlab -i https://pypi.tuna.tsinghua.edu.cn/simple
# Alibaba Cloud source: sudo pip3 install jupyterlab -i https://mirrors.aliyun.com/pypi/simple/

1.2、Node.js
Use the following command to install the latest Node.js:
sudo apt install curl -y
sudo curl -fsSL https://deb.nodesource.com/setup_22.x | sudo -E bash -
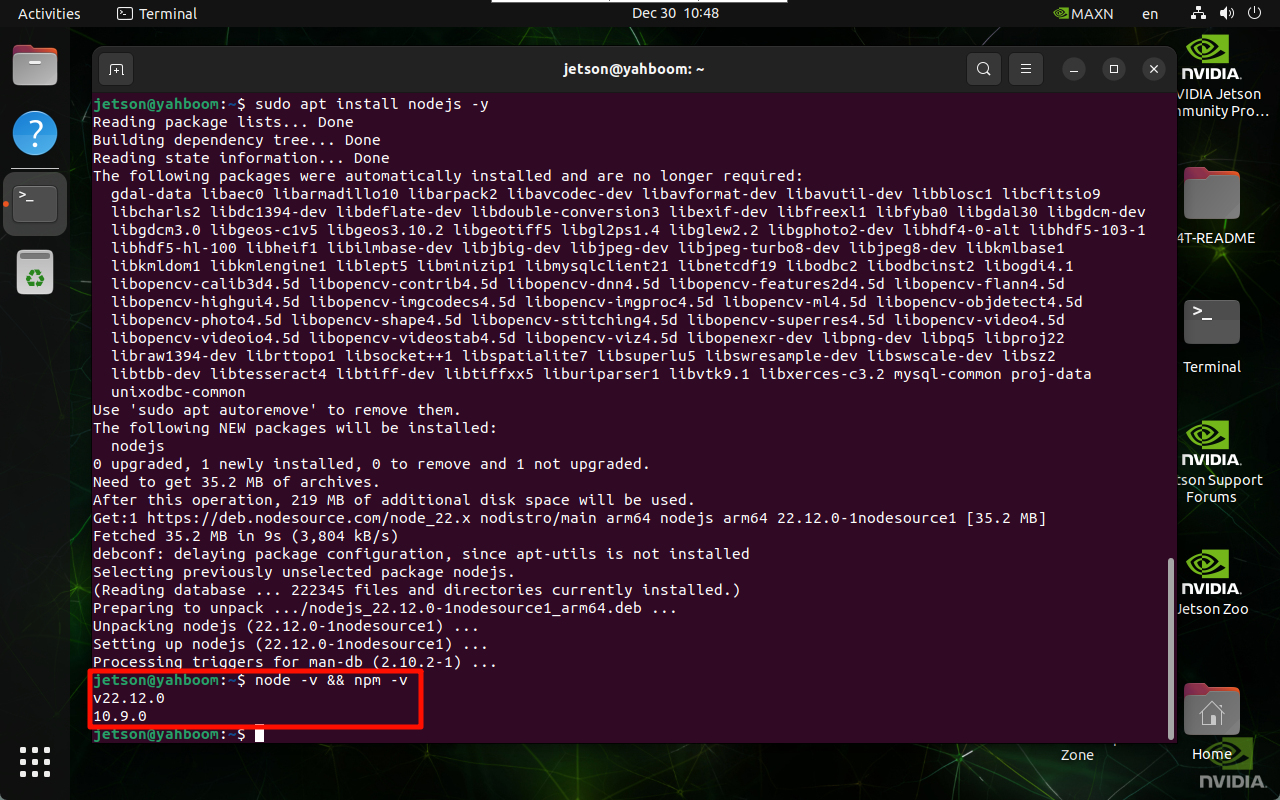
sudo apt install nodejs -y
Verify the version:
node -v && npm -v
2. Jupyter Lab startup
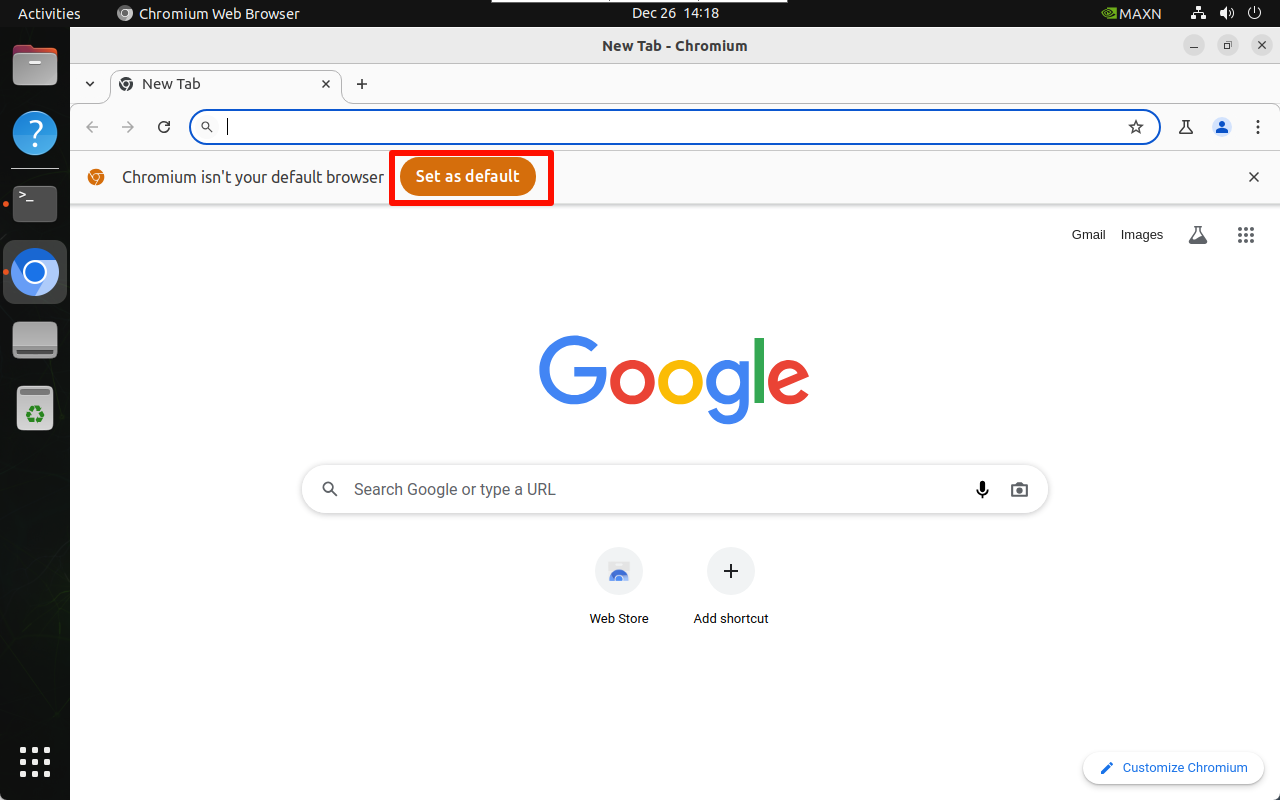
Before starting Jupyter Lab, you need to set the system default browser, otherwise some prompts will appear when starting the terminal.
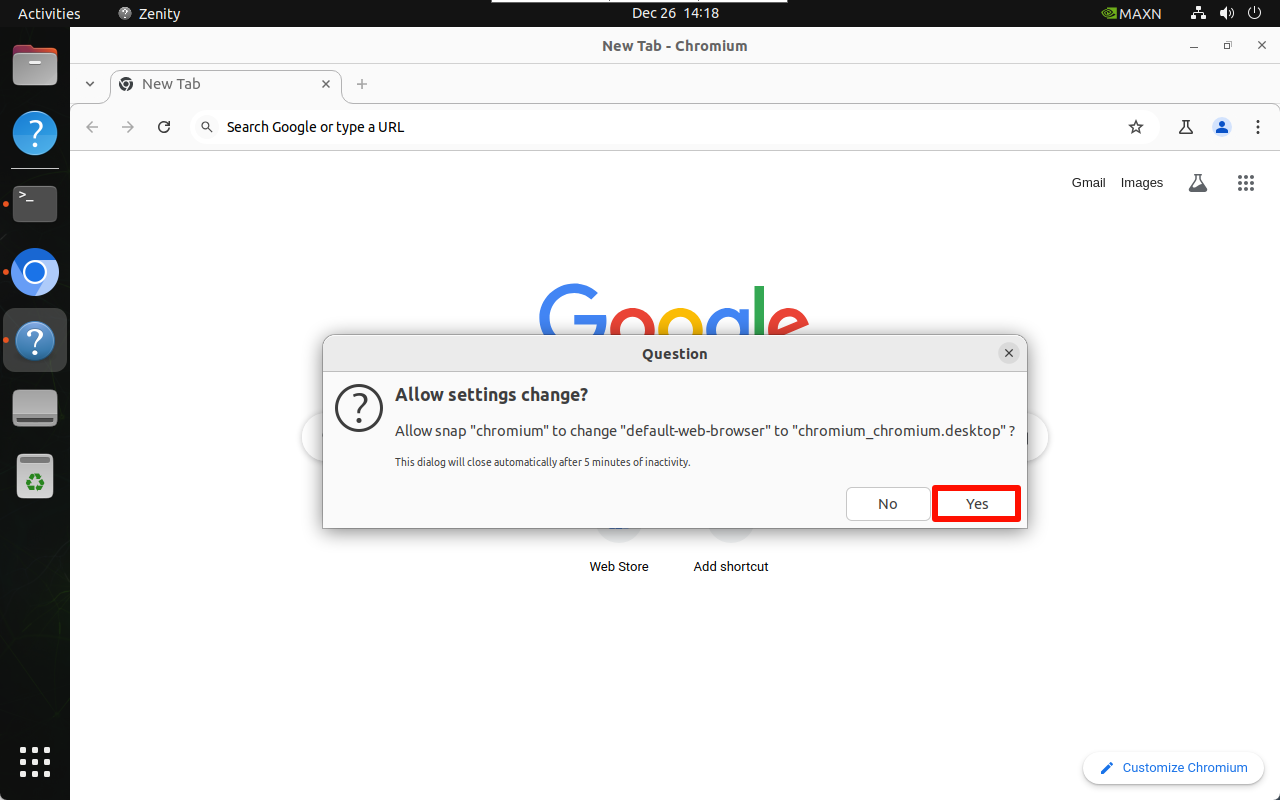
2.1. Set the default browser
Open the system Chromium browser and select Set the default browser:
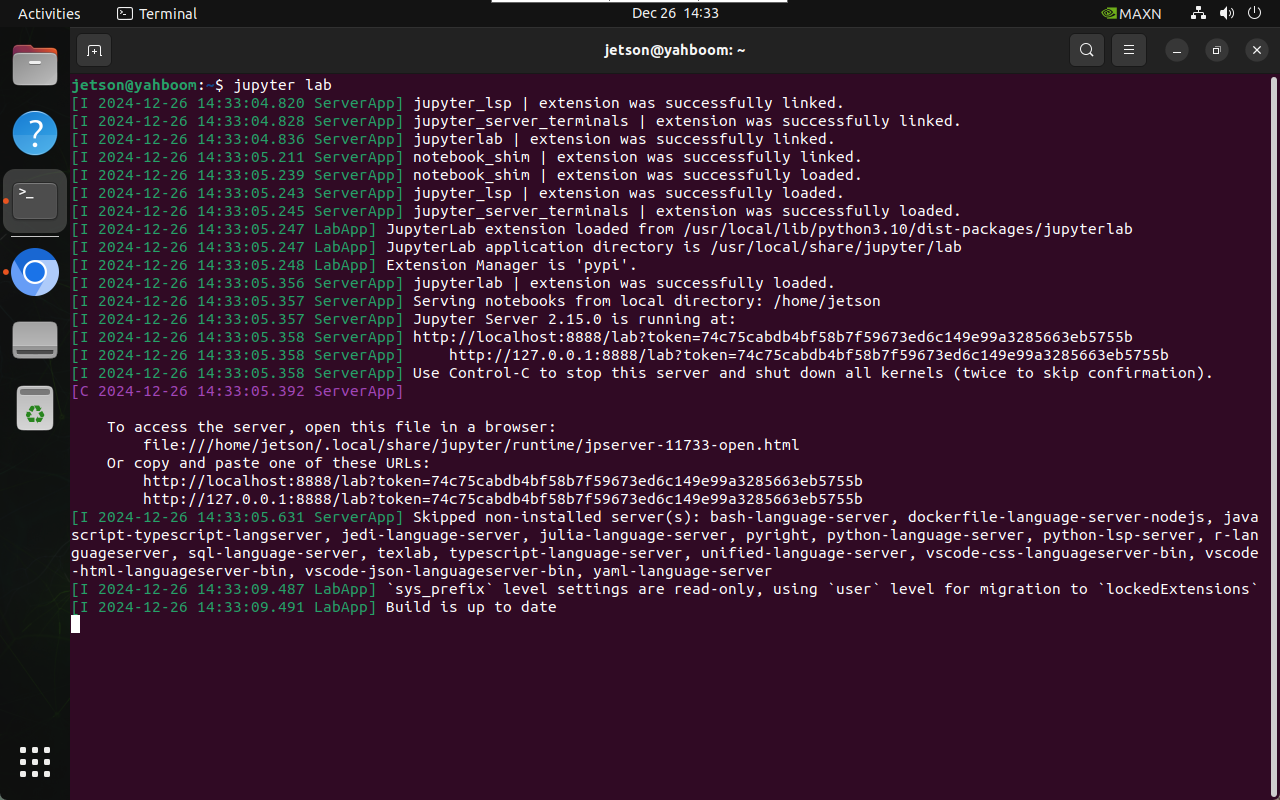
2.2. Start Jupyter Lab
jupyter lab
# Start without browser jupyter lab --no-browser
# Start as administrator sudo jupyter lab --allow-root
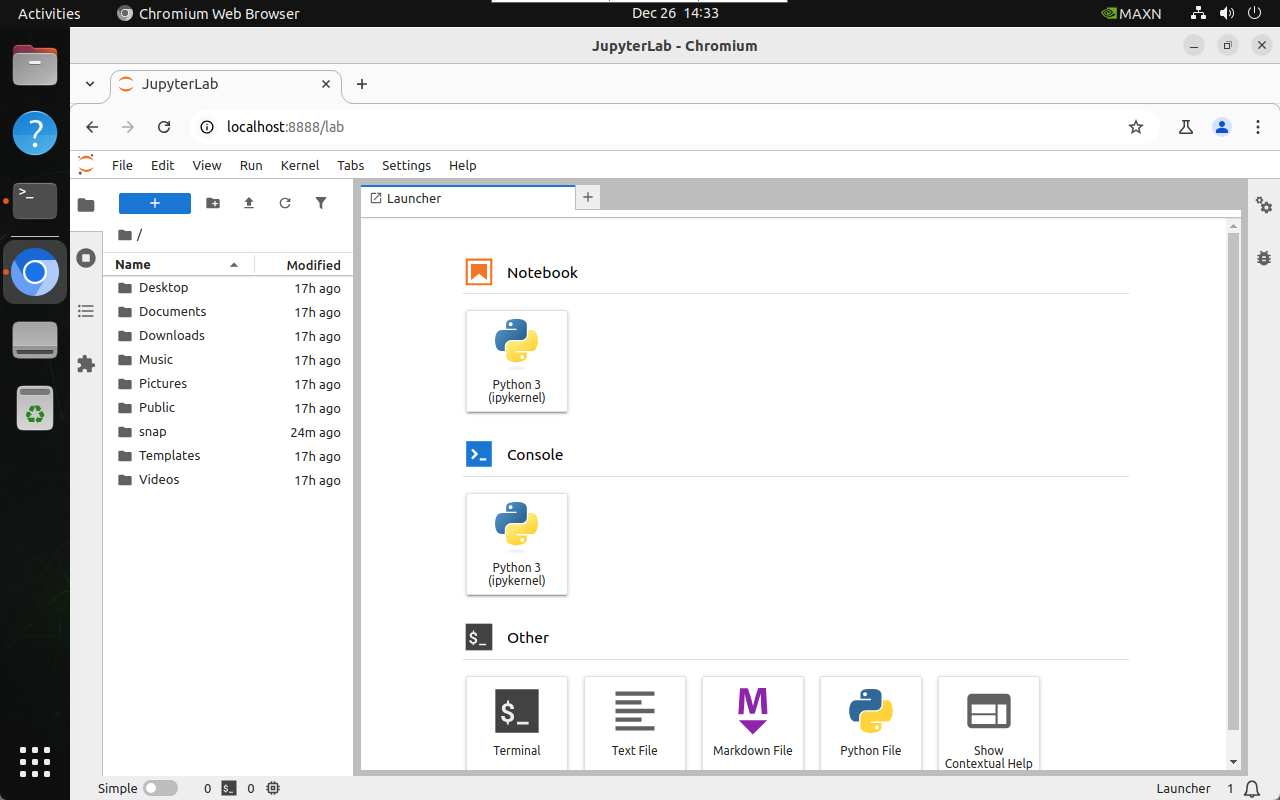
2.3. Host access
The host refers to the Jetson motherboard system access, which can be accessed directly through http://localhost:8888/ :
http://localhost:8888/
3. Jupyter Lab configuration
Configure LAN access, access password, and auto-start for Jupyter Lab.
3.1. LAN access
Device in the same LAN can be accessed by entering IP:8888 in the browser!
The LAN of the campus network is generally inaccessible. You can change the laptop/mobile phone hotspot to test
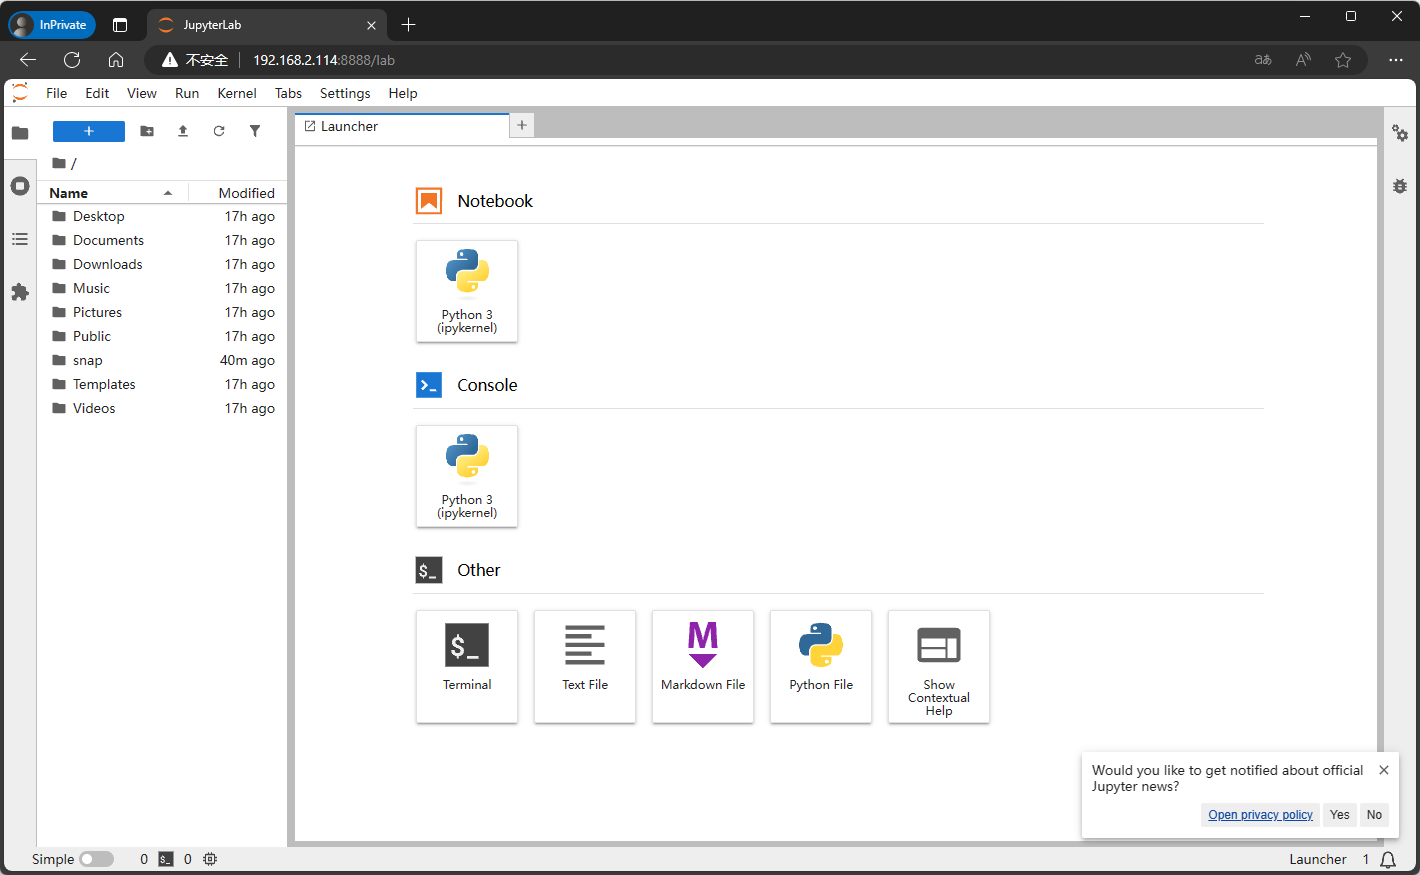
For example, the motherboard IP: 192.168.2.114; we can enter 192.168.2.114:8888 through the browser in the same LAN to perform Jupyter Lab on the motherboard
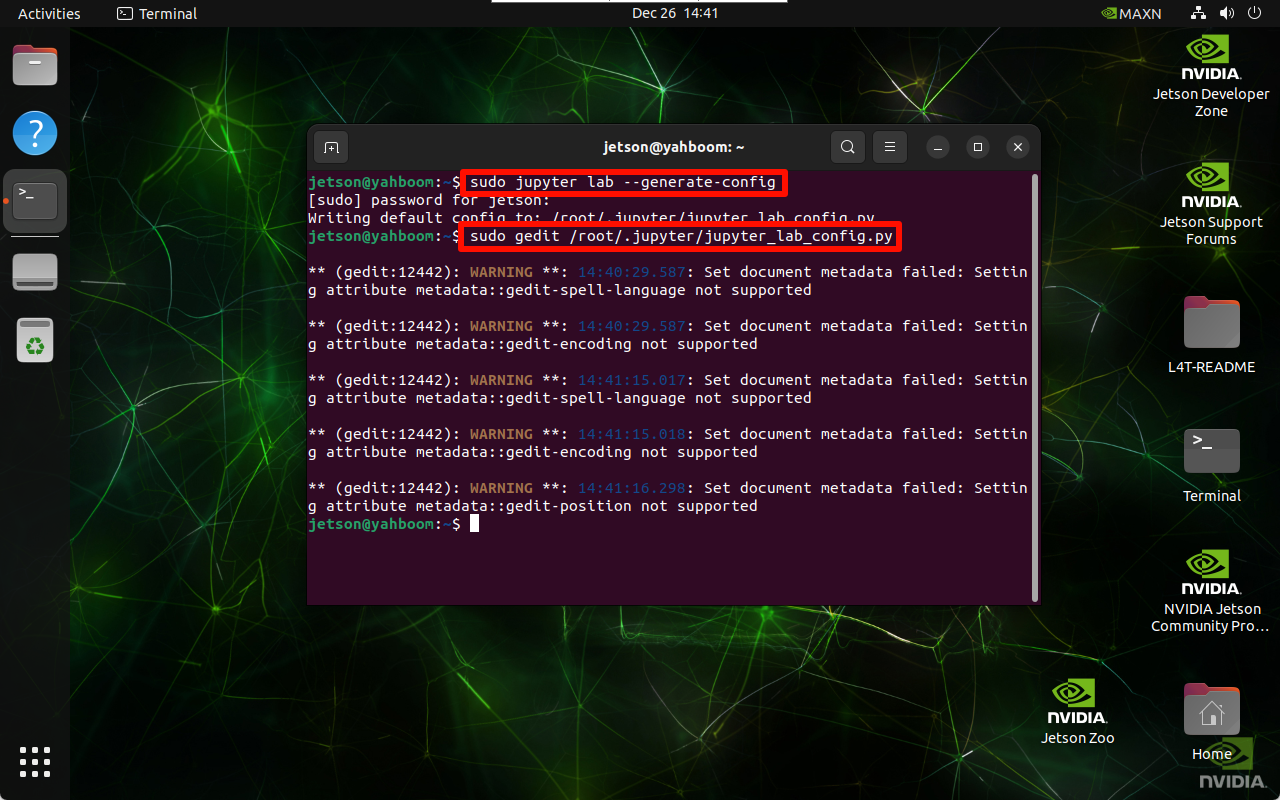
3.1.1, create a configuration file
sudo jupyter lab --generate-config
The location of the automatically generated configuration file: Writing default config to: /root/.jupyter/jupyter_lab_config.py
3.1.2, modify the configuration file
sudo gedit /root/.jupyter/jupyter_lab_config.py
Modified content: After modification, click Save and close the file
# Allow requests from any source to access the Jupyter Lab server
c.ServerApp.allow_origin = '*'
# 0.0.0.0 means binding all available network interfaces and allowing access from any address
c.ServerApp.ip = '0.0.0.0'
# Allow Jupyter Lab server to be started as root user
c.ServerApp.allow_root = True
# Modify the default port to avoid conflicts
c.ServerApp.port = 8888
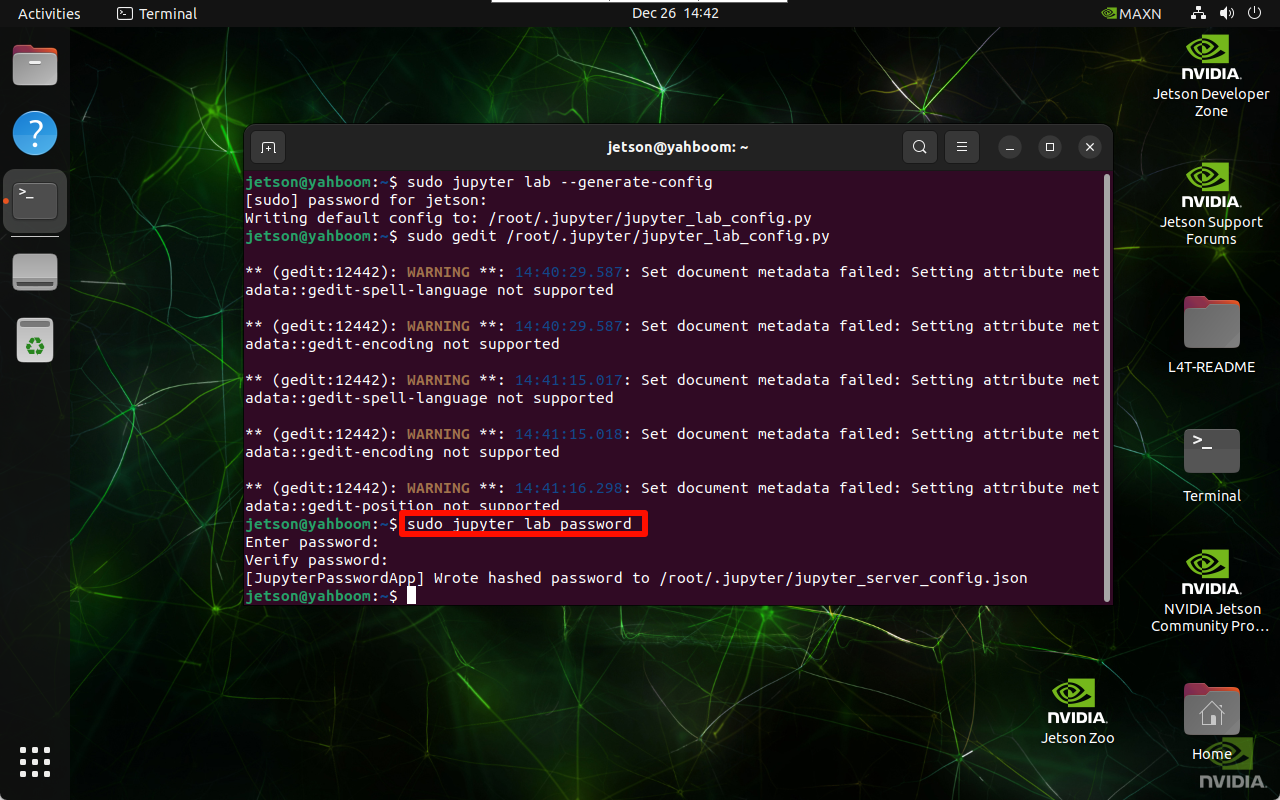
3.2, Configure access password
Enter the command to set the password in the terminal twice, and the input will not be displayed when entering the password!
sudo jupyter lab password
Automatically generated configuration file location: [JupyterPasswordApp] Wrote hashed password to /root/.jupyter/jupyter_server_config.json
3.3, Start the service automatically at boot
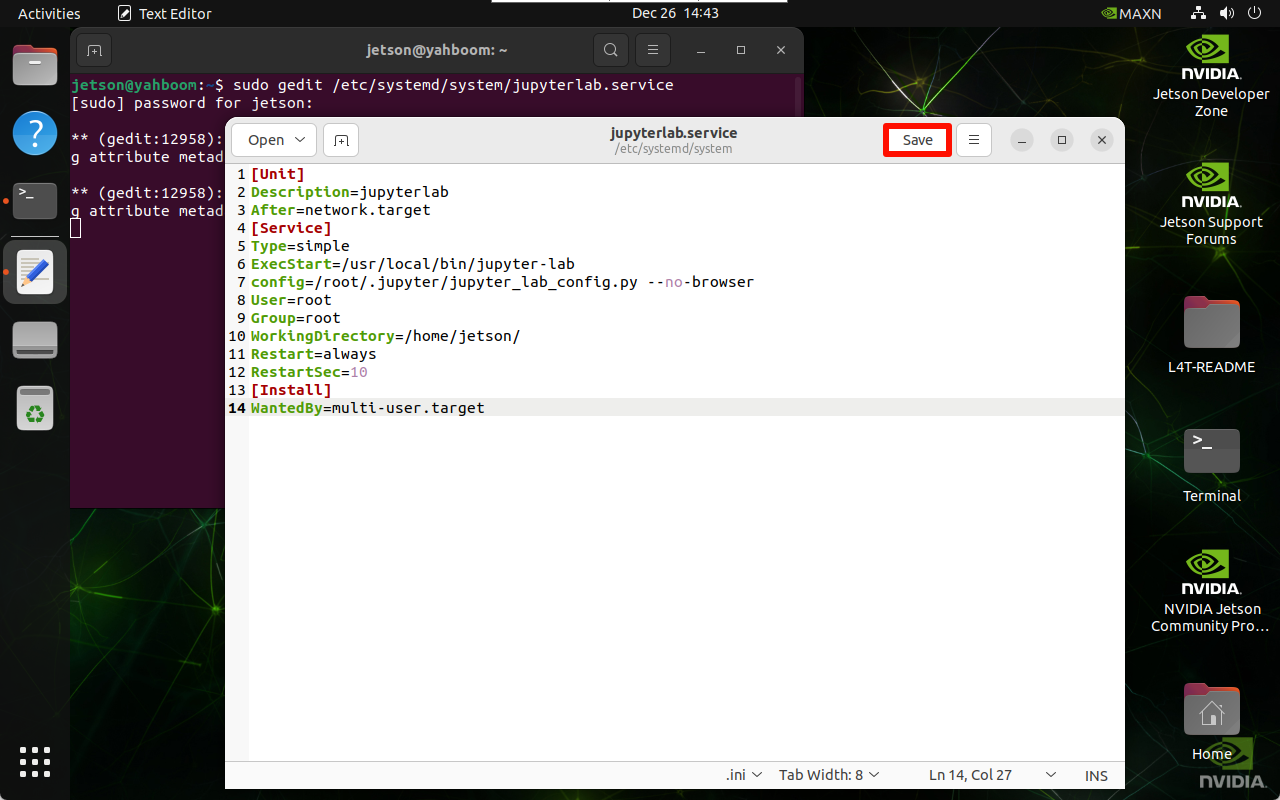
3.3.1, Edit the service file
sudo gedit /etc/systemd/system/jupyterlab.service
Add content: Click Save and close the file after adding
[Unit]
Description=jupyterlab
After=network.target
[Service]
Type=simple
ExecStart=/usr/local/bin/jupyter-lab
config=/root/.jupyter/jupyter_lab_config.py --no-browser
User=root
Group=root
WorkingDirectory=/home/jetson/
Restart=always
RestartSec=10
[Install]
WantedBy=multi-user.target
root: system user name
ExecStart: command to start Jupyter lab, change to JupyterLab installation path
config: change to JupyterLab configuration file path
WorkingDirectory: the working directory opened by starting Jupyter-lab, which can be changed by yourself (it is recommended to change to the user directory)
Check Jupyter-lab installation path: which jupyter-lab
Configuration file path: refer to the path of the configuration file generated above
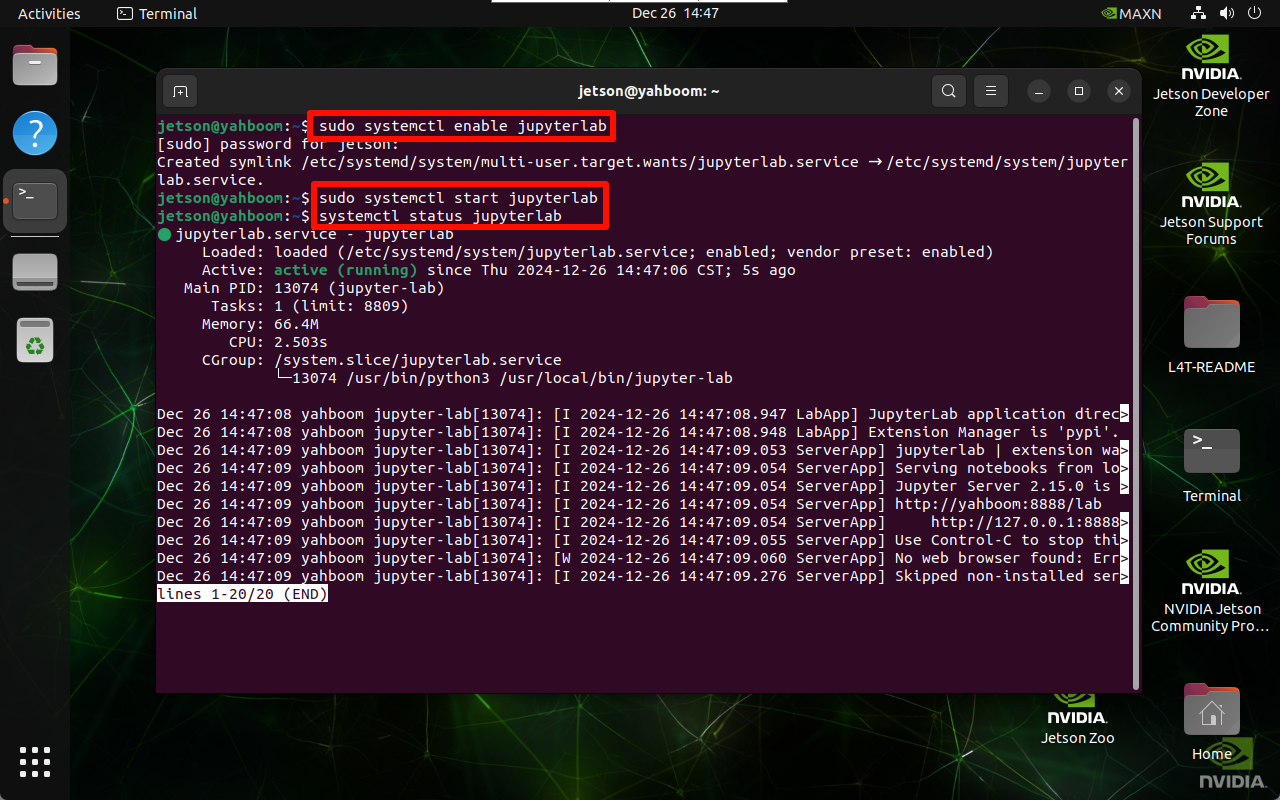
3.3.2, set up the self-start service
Startup service automatically
sudo systemctl enable jupyterlab
# Disable startup systemctl disable jupyterlab
Start service
sudo systemctl start jupyterlab
# Stop service sudo systemctl stop jupyterlab
Check service status
systemctl status jupyterlab
Verify startup
After restarting the system, use the same LAN device to access the motherboard IP:8888 based on the system IP.
You need to enter a password for the first access, which is the information set in the previous step;
When taking the screenshot, the IP of the motherboard is 192.168.2.114, so devices in the same LAN can access 192.168.2.114:8888
4. Use Jupyter Lab
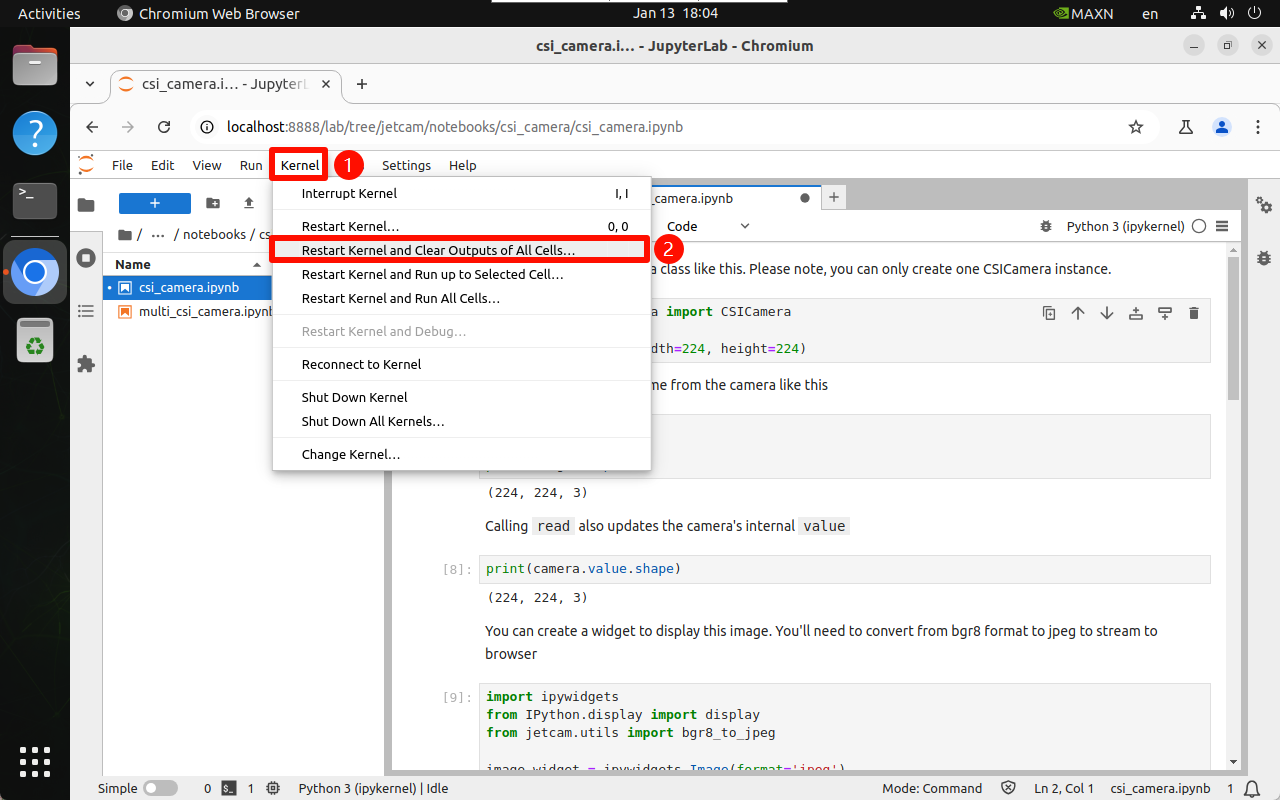
4.1. Kernel
It is recommended to restart the kernel and clear all unit block output information every time you run a program or the program is abnormal:
4.2. Run the program
Through Jupyter Open the program file to be run in Lab, and run the program from top to bottom to run the unit blocks in sequence:
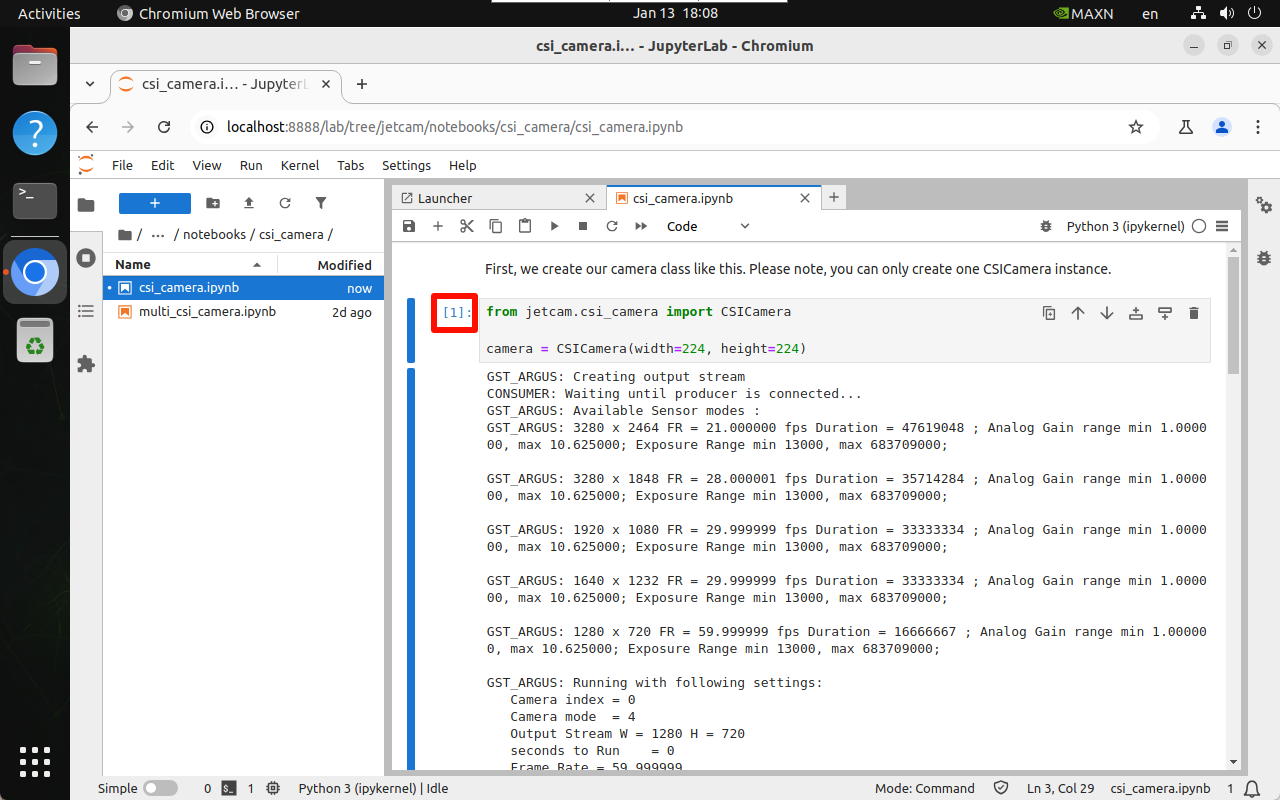
4.2.1. Running
[*] is displayed in the upper left corner of the unit block to indicate that it is running:

4.2.2. Running completed
[Number] is displayed in the upper left corner of the unit block to indicate the number of times it has been run: for example, [1] → the program has run the unit block code for the first time